Installation Instructions
You can download a printable version of installation instructions from here
>> Illustrations:
Backlit numbers:

Mounting hardware:

60W LED Driver - 110V AC to 12V DC Converter Transformer:

Timer - Auto On/Off:


Dusk to Dawn Light Sensor - Auto On/Off:

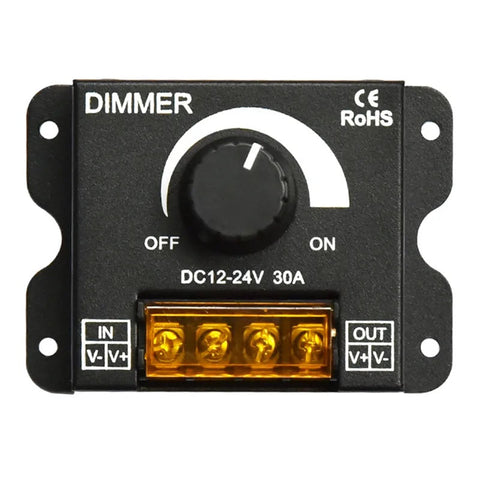
Dimmer/Brightness Controller:
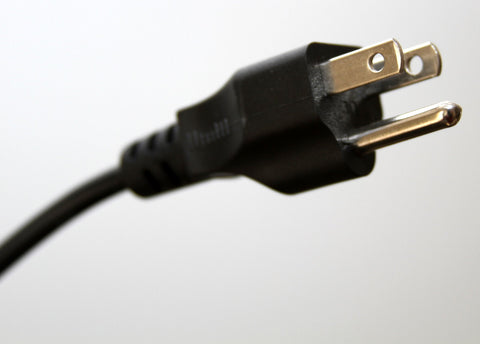
Plug - To connect to Outlet:
Solar Panel Power Bank:


>> Powering options:

>> What do you need for installation:
- Backlit address numbers - included
- Power source (only one needed):
- 60W LED driver - included if purchased
- Solar panel power bank - included if purchased
- Paper installation template - included
- Mounting screws - included
- (Optional) Plug - included if purchased
- (Optional) Timer Auto On/Off - if purchased
- (Optional) Dusk to Dawn Light Sensor Auto On/Off - included if purchased
- (Optional) Dimmer - included if purchased
- 14AWG wire – not included
- Painters tape - not included
- Drill - not included
- 5/32" drill bit - not included
- Hammer – not included
- Level - not included
- Exterior grade epoxy (silicone glue) - not included
>> Mounting instructions:

>> Installation instructions:
- Before you start the installation process, please read the caution at the bottom of this page.
- Tape the included paper installation template to the wall and drill holes for the screws and the wires at the designated marks on the template using a 5/32" drill bit.
- Screw the screws into the holes on the back of the backlit numbers.
- Add some epoxy glue to the other end of the screws (that will go into the wall) at the back of the backlit numbers.
- Remove the installation template and mount the backlit numbers on the wall by aligning the screws to the holes you drilled in the wall and pushing the screws into the holes.
- Select the correct wiring diagram below based on your purchase and follow it for connecting power to your lighted address numbers and accessories
>> Wiring diagrams:
Wiring diagram 1 (plug in and without timer or light sensor):


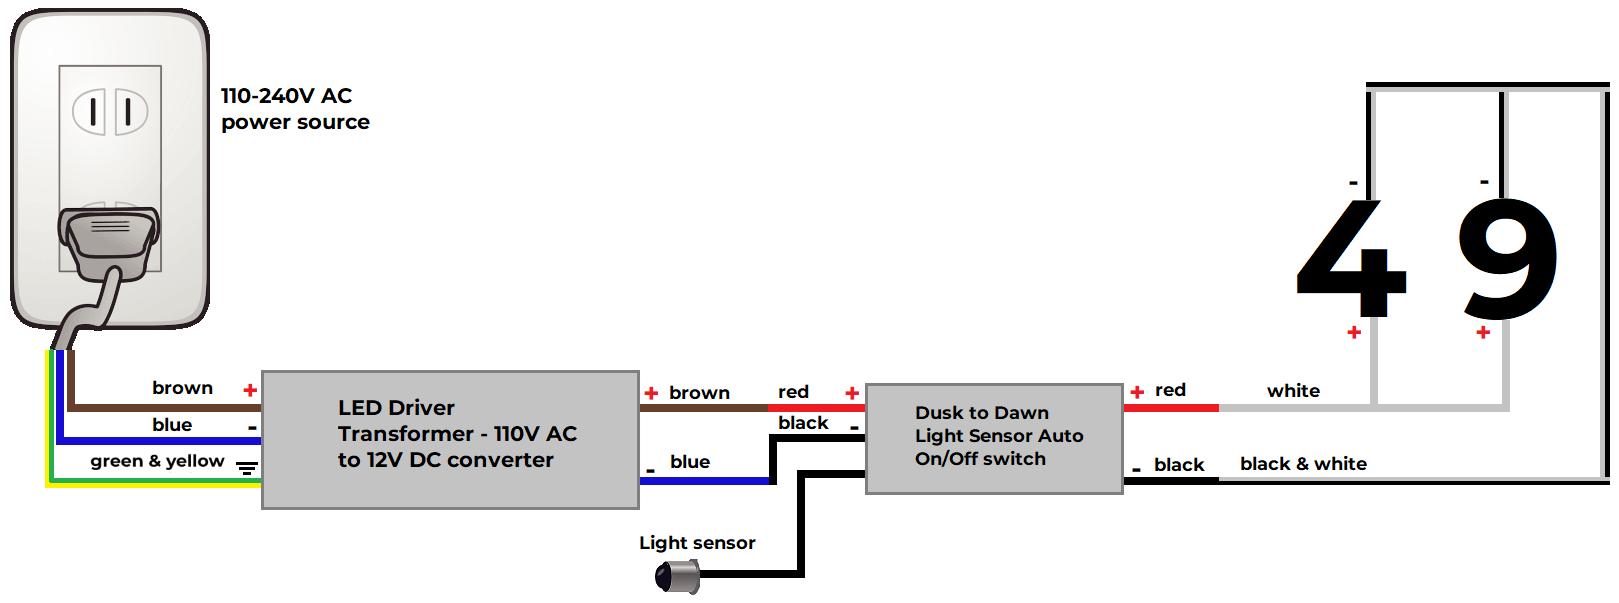
Wiring diagram 2 (plug in and with light sensor):
Wiring diagram 3 (plug in and with timer):


Wiring diagram 4 (hardwiring/plug in with dimmer):

Wiring diagram 5 (hardwiring/plug in with light sensor and dimmer):

Wiring diagram 6 (hardwiring/plug in with timer and dimmer):

Wiring diagram 7 (solar panel power bank):


>> Solar panel power bank installation & operating instructions:
Connecting the lighted numbers to the solar panel:
Please make sure the adapter at the end of the solar panel wire and the adapter at the end of the lighted address numbers wire are aligning correctly and facing the same direction.
Charging the solar panel:
- Once you connect the numbers to the solar panel and are ready to charge it, press (push in) the red button on the back of the solar panel to start charging the solar panel.
- Please note that the solar panel needs to be exposed to sunlight during the day to charge and turn the lighted numbers on.
- The solar panel has a built-in (dusk to dawn) light sensor which only allows the numbers to run and turn on at night. It will not light the numbers on during the day.
*Optional* - Solar panel remote instructions manual (not needed to run the solar panel):
- ON: Turn on the lighted numbers
- OFF: Turn off the lighted numbers
- NC: Flashing light mode
- Brightness button with empty circle: Bright light mode
- Brightness button with half-filled circle: Dim light mode
- W: Decrease lighted numbers brightness
- Y: Increase lighted numbers brightness
- W & Y: Fading light mode
- AUTO: Get out of the timing function
- 3H timing function: Turn on the lighted numbers after 3 hours
- 5H timing function: Turn on the lighted numbers after 5 hours
- 8H timing function: Turn on the lighted numbers after 8 hours

>> Timer Installation & Operating Instructions:
Key Functions & Features:
- LCD Display | Lithium battery for power reserve.
- Auto and manual modes: Switch between manual and automatic modes.
- Power rating: 12V to 220V DC & AC | Load capacity: 10A.
- Temperature rating: -10°C to +40°C.
Initial Setup:
1. Unlock Timer:
Press the "C/R" button four times until the "lock" symbol disappears. If idle for 15 seconds, the lock reactivates.
2. Set Current Time:
Press "C" to enter time-setting mode. Use H+ and M+ to adjust hours and minutes. Press "C" to save.
Programming ON/OFF Times:
- Press "P" to begin programming.
- Set the ON time using H+ and M+ to adjust hours and minutes.
- Press "P" again to set the OFF time.
- Repeat steps for additional programs (up to 20).
- Press "C" to exit.
Manual Override:
Press the MANUAL button to toggle between AUTO and MANUAL modes.
<<< CAUTION >>>:
Installation instructions and wiring diagrams are for reference only. Wiring and installation should be done be a certified electrician after verifying the right connection diagrams, ratings, safety regulations, and electrical code.
The backlit address numbers are 12V DC which means they cannot be connected directly to any AC power source. You will need to connect them to the LED Driver (110V AC to 12V DC) first (make sure to connect them to the correct side of the LED Driver) and then connect the LED driver to the 110V AC power source.
Safety Note: Connecting the backlit address numbers directly to an AC power source (e.g. 110V-240V AC panel, 110V-240V AC outlet, etc.) without the 110V to 12V AC to DC converter (LED Driver) is very dangerous, not safe, and should not be done under any circumstances.